
Note:The network map has been removed from this page to provide additional space during administrative tasks such as managing alerts, users, settings, and integrations. To return to your network map, simply click Home Dashboard or All Sites in the Auvik side navigation.
User role management is easy with Auvik. In addition to user and invitation management, you can manage the roles you assign to your users. If you want, you can filter your role list to show only certain roles. For more information on filtering, see How to filter data in Auvik.
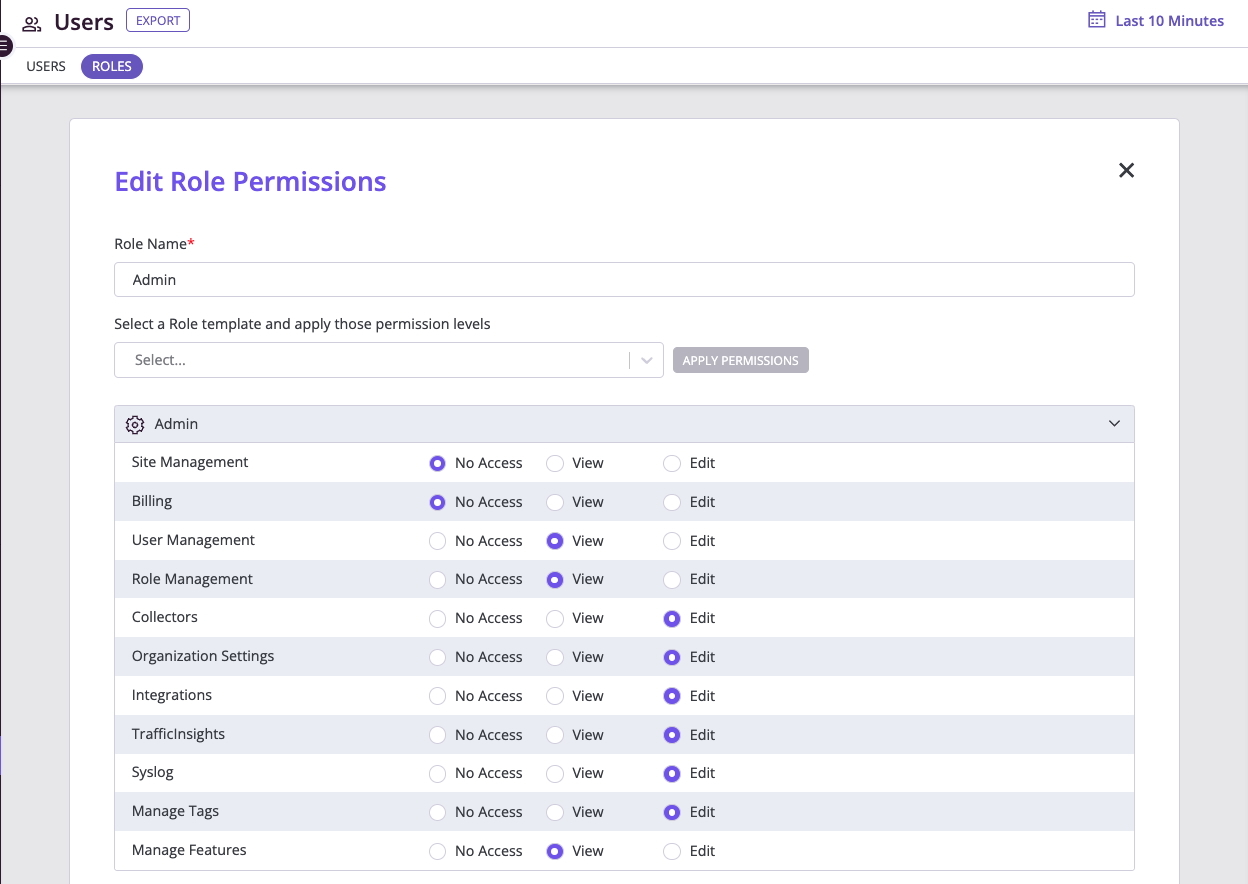
Roles are managed from your top-level MSP (multi-client) dashboard. Permissions for a given role are broken down into areas and screens within Auvik.
Note: Editing user roles as well as granting user access for a multi-site should be done from the multi-site dashboard. For more information about this dashboard, click here.
|
Area |
Screen |
Navigation/button visibility |
|
Admin |
|
|
|
Device details and access |
|
|
|
Documentation |
|
|
|
Discovery |
|
|
|
Alerts |
|
|
|
Inventory API |
|
|
| Alert API |
|
|
| Poller API |
How to add user roles
Roles added from your MSP dashboard are available to all your clients. The steps below are specific to adding a role that includes dashboard access. To create an API Access Only role, see How do I add API access only roles?
If you’re creating a new role for users responsible for billing only and they need to see which clients are assigned to which type, the role must include these two permissions at a minimum:
- The appropriate billing permission level (view or edit)
- Client management (view)
If the user has been granted edit permissions for billing, they’ll also have the ability to manage client types.
Note: To create a role that can call the SNMP poller related APIs (SNMP Poller and SNMP Poller History APIs), the target user should belong to a role which at minimum also has theAPI - Device Details permission.
- Click Manage Users in the side navigation bar.
- Click Roles.
- Click Add Role.
- Enter a name for the role.
- Select the desired permissions or use a role template to start.
- Click Save.
How to add API access only roles
The below steps are specific to adding a role that only has API access, and no dashboard access, to create a role that includes dashboard access, refer to How to add user roles.
- Click Manage Users in the side navigation bar.
- Click Roles.
- Click Add Role.
- Enter a name for the role.
- Check API Role Only
- Select the desired permissions.
- Click Save.
How to create a new role using the role template
- Click Manage Users in the side navigation bar.
- Click Roles.
- Type the name you want for the role under Role Name.
- Using the pull down menu, select the role you want to use as a Role Template.
- Click Apply Permissions.
- Make any desired changes to the permissions to the new role.
- Click Save.
How to edit roles
- Click Manage Users in the side navigation bar.
- Click Roles.
- In the displayed list of roles, find the role you want to edit. Check the box at the beginning of each row.
- Click the Edit button.
- Select any changes to the existing permissions.
- Click Save.
How to delete roles
Roles that are currently assigned to users can’t be deleted. To delete a role, you must first unauthorize all users from the role.
- Click Manage Users in the side navigation bar.
- Click Roles.
- In the displayed list of roles, find the role you want to edit. Check the box at the beginning of each row.
- Click the Delete button.
- Confirm the cancellation by clicking Delete.
How to recreate a role
Note: This replaces the former restore capabilities.
- Click Manage Users in the side navigation bar.
- Click Roles.
- Click Add Role.
- Enter a name for the role you are recreating.
- As an example, if you have deleted Level 2 Tech, enter Level 2 Tech as the name.
- Using the pull down menu, select the role you want to use as a Role Template.
- Continuing the above example you would choose the Level 2 Tech template.
- Click Apply Permissions.
- Click Save.